In the previous posts we took the first steps to dockerize our hello world application. This allows us to run the application on any host, as long as it runs Docker. We also dockerized the build plan, which allows us to use any build server, as long as it runs Docker. Now we’re ready to run the application on production. Where should we run it?
With Docker being such a popular technology, it’s no surprise that cloud providers such as AWS and Azure offer support for it (here’s for example an older post with AWS Elastic Beanstalk). You can simply provide the Docker image and the cloud provider takes care of the rest.
But running an application is the bare minimum. Depending on your needs, you might need load balancing, scaling, health monitoring. Maybe you need rolling updates, automatic rollback on failure, secrets and configuration management.
Kubernetes offers all of the above. It is “an open-source system for automating deployment, scaling, and management of containerized applications”. Additionally, you can use it with your existing cloud provider (e.g. AWS or Azure).
Small side note: I’ve only worked with Kubernetes for a month or less but I’m very impressed by the features it offers and how transparent its configuration is. Once you understand the concepts, it’s a system that just makes sense when you work with it. Having said that, I’d like to share this funny image I found on the internet, captioned “just deployed my blog on Kubernetes”:
As I had said in a previous post, my advice is to pick a solution that fits the business needs, not a solution that is cool to work on. End of side note.
To experiment with Kubernetes on your local laptop, you can use minikube. You’ll need the following tools:
- VirtualBox - simplest virtual machine option
- minikube - runs a single-node Kubernetes within a virtual machine
- kubectl - command line utility to talk to Kubernetes
If you’re on a Mac, try to install these tools with brew. If you’re on Windows, give Chocolatey a try, it worked for me (choco install minikube kubernetes-cli). You can also try to skip VirtualBox if you have xhyve or Hyper-V enabled. I’m using VirtualBox on Windows for the rest of this post.
Make sure that minikube and kubectl are available from your terminal before doing anything else:
PS> minikube version
minikube version: v0.23.0
PS> kubectl version --client
Client Version: version.Info{Major:"1", Minor:"8", GitVersion:"v1.8.4", GitCommit:"9befc2b8928a9426501d3bf62f72849d5cbcd5a3", GitTreeState:"clean", BuildDate:"2017-11-20T05:28:34Z", GoVersion:"go1.8.3", Compiler:"gc", Platform:"windows/amd64"}
(side note/rant: I really wish we’d standardize on --version, it seems the new tools like to use version instead…)
Now we can start our local Kubernetes with minikube start. On its first run, it will take some time because it needs to download the virtual machine it will run. Let’s run some commands to see it’s running:
PS> minikube status
minikube: Running
cluster: Running
kubectl: Correctly Configured: pointing to minikube-vm at 192.168.99.100

PS> kubectl cluster-info
Kubernetes master is running at https://192.168.99.100:8443

To further debug and diagnose cluster problems, use 'kubectl cluster-info dump'.

PS> kubectl get nodes
NAME       STATUS    ROLES     AGE       VERSION
minikube   Ready     <none>    1d        v1.8.0
Well, it seems it’s running fine. At least we’re not getting any errors. Note the IP address, which is in this case 192.168.99.100. The last command, kubectl get nodes, is returning the nodes that comprise the cluster. This is just minikube, which is a single node setup. With Kubernetes you can have multiple nodes (multiple machines) that you can use to implement scaling, load balancing, high availability.
Our goal for this post is to deploy our hello world application inside our local Kubernetes, using the command line interface (kubectl). Let’s start.
First of all, we need to make our docker images available to minikube. Minikube is running within a virtual machine and it’s running its own docker. The images we built locally on the previous posts will not be visible there. One option is to publish them on a registry, so that minikube can pull them from there. But a simpler option is to just use minikube’s docker.
With minikube docker-env we get the instructions on how to do that (on a Mac it will look different):
PS> minikube docker-env
$Env:DOCKER_TLS_VERIFY = "1"
$Env:DOCKER_HOST = "tcp://192.168.99.100:2376"
$Env:DOCKER_CERT_PATH = "C:\Users\ngeor\.minikube\certs"
$Env:DOCKER_API_VERSION = "1.23"
# Run this command to configure your shell:
# & minikube docker-env | Invoke-Expression
Simply run the command that is mentioned on the last line:
PS> & minikube docker-env | Invoke-Expression
You can then run docker ps to double check it worked. You’ll see many containers running, which are used by Kubernetes internally.
Now that we’re connected to minikube’s docker daemon, let’s rebuild our hello world image:
PS> docker build -t blog-helm .
Now we can try to run it:
PS> kubectl run blog-helm --port=3000 --image=blog-helm --image-pull-policy=Never
deployment "blog-helm" created
This command created a deployment named ‘blog-helm’. A deployment provides all the necessary information to Kubernetes about how to run and scale an application. In this case we’re not telling much to Kubernetes, just that:
- the deployment should be named 'blog-helm'
- the app will listen at port 3000
- the Docker image name is also 'blog-helm'
- and the final flag tells Kubernetes to not pull the image from a registry, just use the one we just built. This is a workaround since we're not using an image registry
We can use the CLI to see if the deployment succeeded``` PS> kubectl get deployments NAME DESIRED CURRENT UP-TO-DATE AVAILABLE AGE blog-helm 1 1 1 1 40s
Since we didn't specify any special values, it uses the defaults, which means one instance of the application is enough. In Kubernetes the containers are run within a <strong>pod</strong>. Let's see our pods too:
PS> kubectl get pods NAME READY STATUS RESTARTS AGE blog-helm-68694dbdc4-k9p4s 1/1 Running 0 25s
Now that our application is running, we should be able to see it in a browser. Remember that the IP of the cluster was 192.168.99.100 so maybe our app is available at http://192.168.99.100:3000. Unfortunately, that does not work.

A deployment runs the application just fine, but the application is not accessible outside the cluster. If we want to do that, we need to use a <strong>service</strong>. Let's run this command:
PS> kubectl expose deployment blog-helm –type=NodePort service “blog-helm” exposed
With this command, we're exposing the deployment 'blog-helm'. The service that is created has the same name. The flag '--type=NodePort' means that it will pick automatically a port for us (good enough for a local experiment). Let's see what we have:
PS> kubectl describe service blog-helm
Name: blog-helm
Namespace: default
Labels: run=blog-helm
Annotations:
We can see various other IP addresses, but these are internal to the cluster. The port we’re looking for is 31906. Indeed, if we visit http://192.168.99.100:31906/, we’ll see the hello world message of the application.
One more trick: if you run minikube dashboard, you’ll get a web dashboard showing you the same information we’ve explored with the CLI and more:
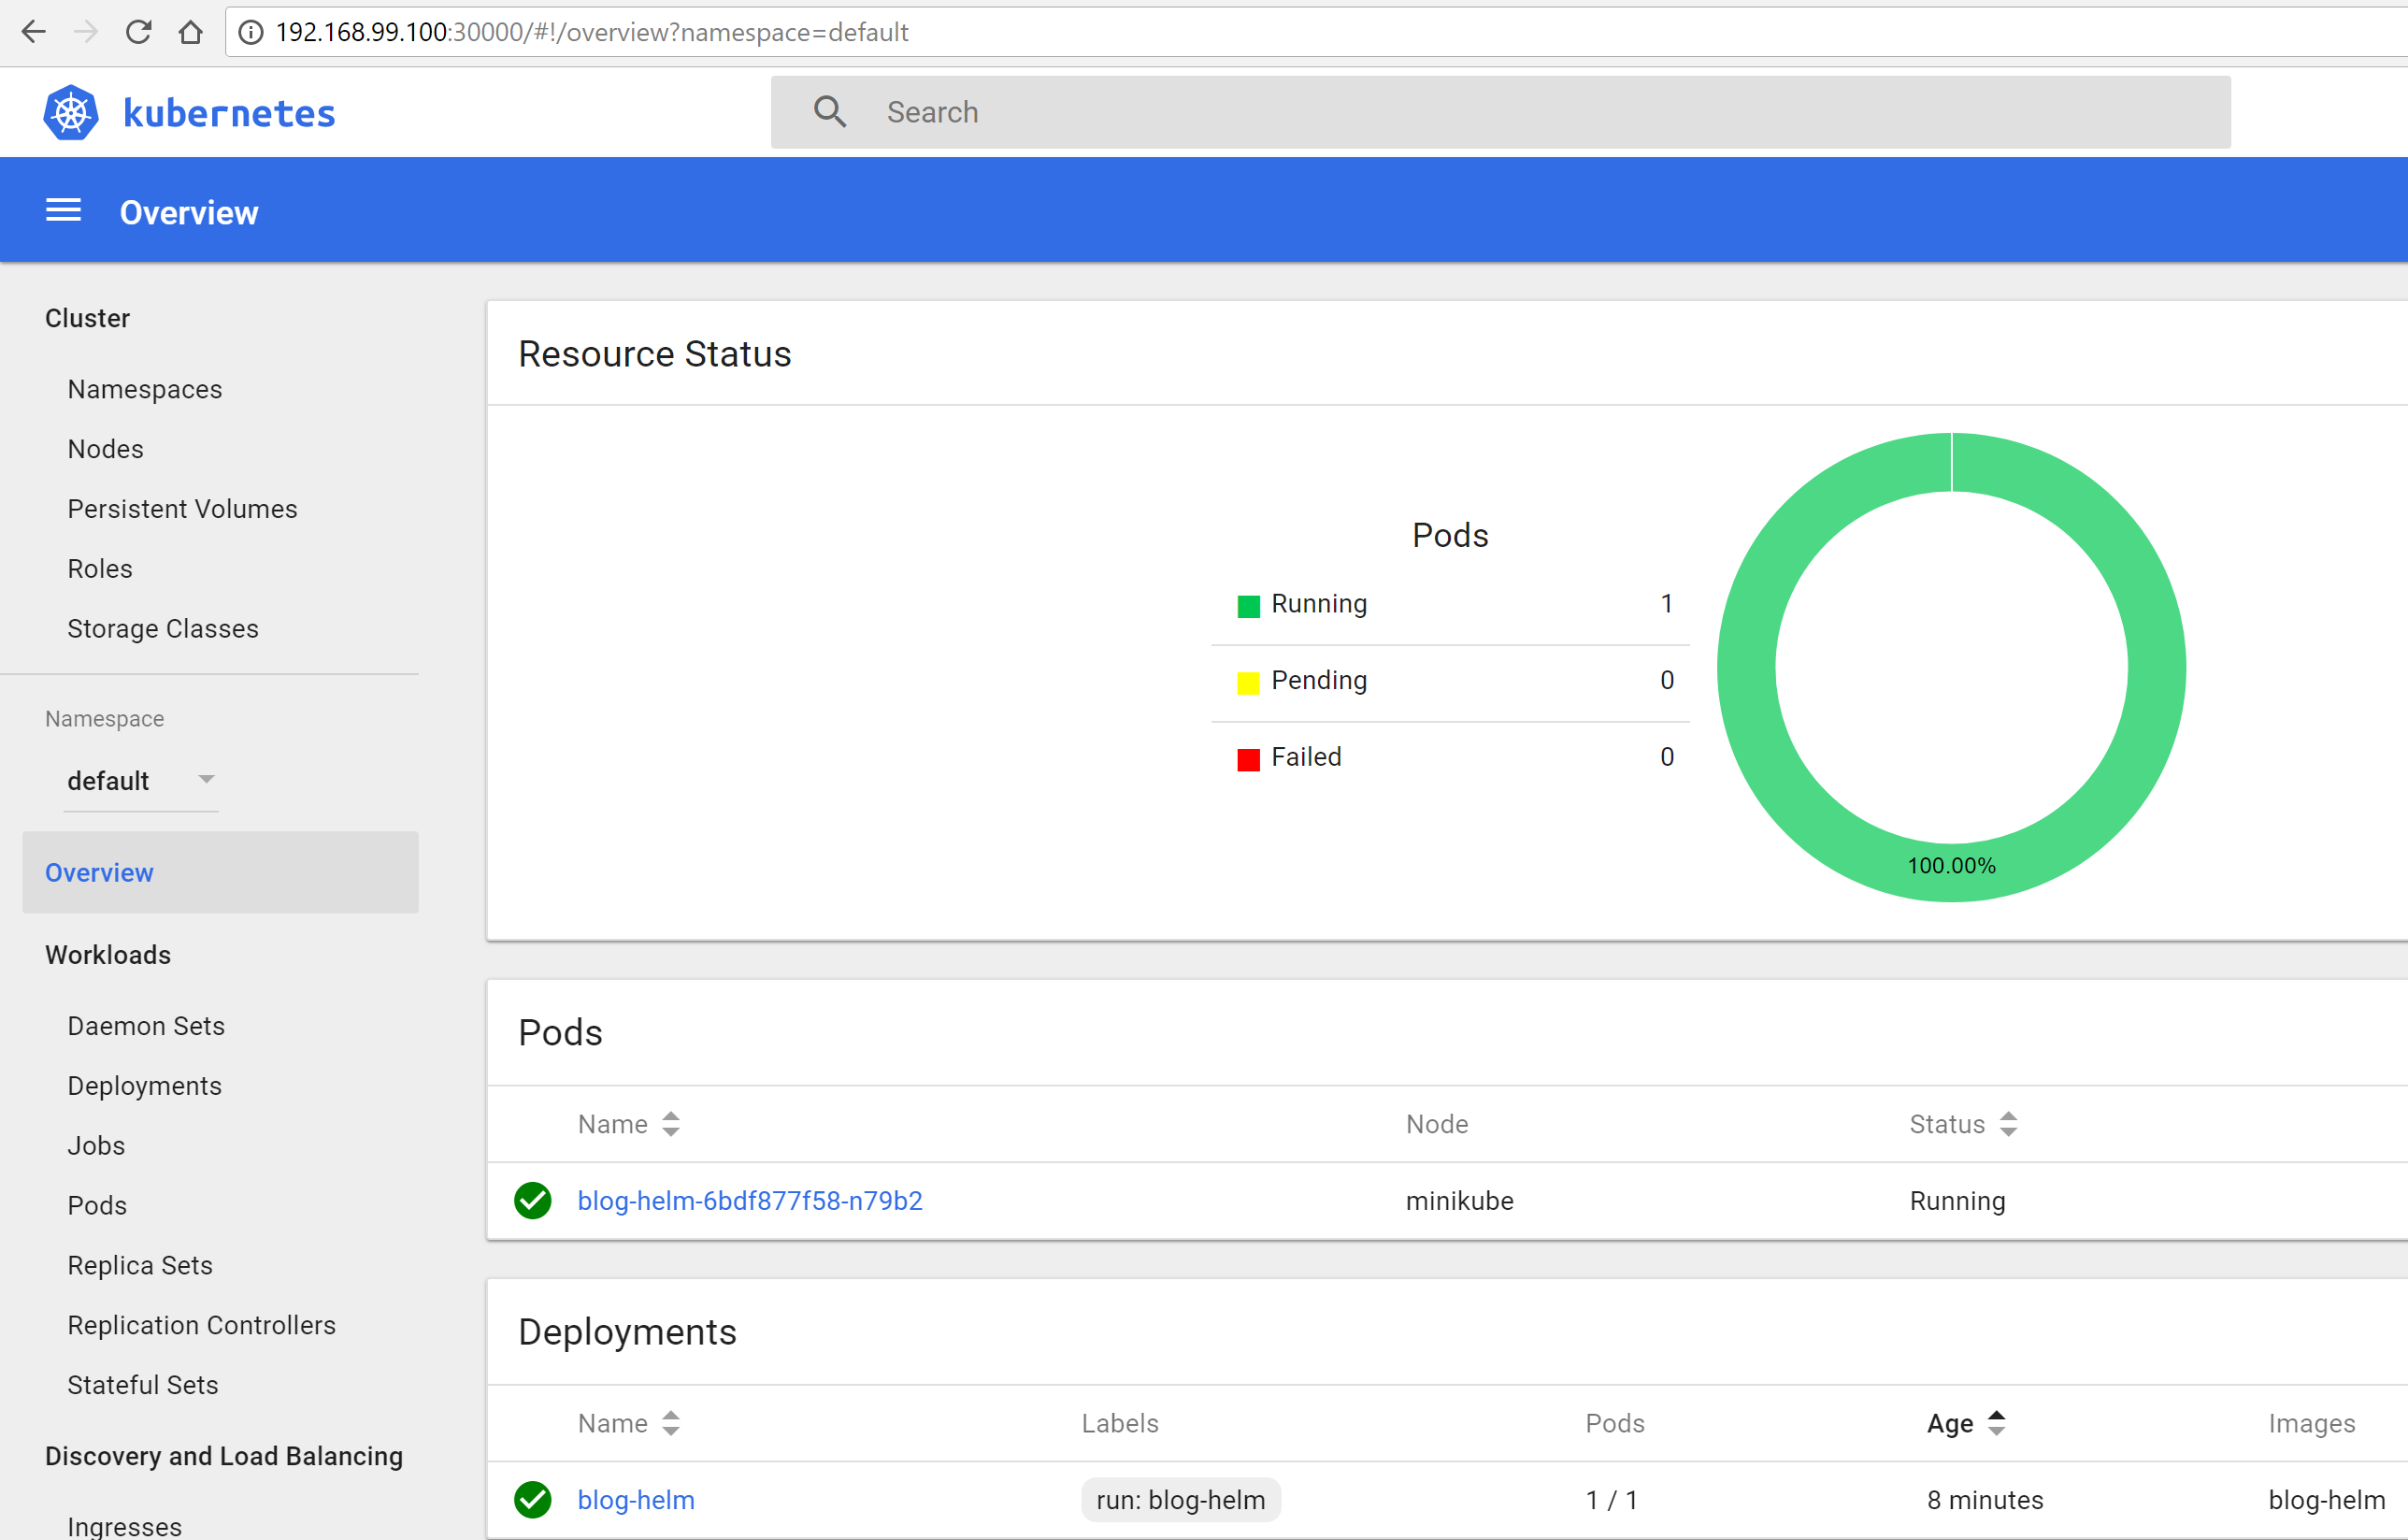
To summarize what we did in this post: we installed minikube locally. We connected to minikube’s docker daemon. We created a deployment to run the app inside a pod. Finally we created a service to expose the deployment outside the cluster. There are a lot of Kubernetes concepts here already, but if you want you can study these in details online.
In the next post, we’ll move away from using the CLI in this manner and we’ll describe our application using a Helm chart instead.