In the previous post we had a first look at Kubernetes and deployed our hello world app on a local cluster using the CLI. The simple commands we used are good enough for a first taste. However, the full power of Kubernetes comes with using configuration files. Helm builds on top of that, taking these configuration files to the next level.
Let’s start with the deployment we created last time. We had created it with the command kubectl run. The equivalent YAML file for Kubernetes looks like this:
apiVersion: extensions/v1beta1
kind: Deployment
spec:
  replicas: 1
  template:
    metadata:
      labels:
        app: blog-helm
    spec:
      containers:
        - name: blog-helm
          image: blog-helm
          imagePullPolicy: Never
          ports:
            - containerPort: 3000
This file works fine and we can use kubectl create -f deployment.yaml to run it. The documentation has examples but also proper API reference for these objects. Please note that Helm builds on top of this, so this documentation is still needed.
Helm is a tool which builds on top of this. It calls itself “the package manager for Kubernetes”, a fair statement, as it allows us to package all the necessary YAML files into a single versioned entity called a Helm chart. It offers a templating language, which allows us to keep our Helm chart generic. Thanks to that, we’ll be able to deploy our application on multiple environments (think DTAP) without much effort. And all this without inventing its own syntax; it builds on top of the Kubernetes configuration.
Let’s give it a try. First, you’ll need to install Helm (e.g. brew install kubernetes-helm, unfortunately no Chocolatey package yet). Note that Helm has a client-side part, but also a server-side part, which is called Tiller. Helm uses Tiller to manage its releases. Make sure you install that with helm init:
PS> helm init
$HELM_HOME has been configured at C:\Users\ngeor\.helm.

Tiller (the Helm server-side component) has been installed into your Kubernetes Cluster.
Happy Helming!
Give it some time while it installs itself in the minikube cluster. You can monitor progress with kubectl get pods -n kube-system:
PS> kubectl get pods -n kube-system
NAME                            READY     STATUS              RESTARTS   AGE
kube-addon-manager-minikube     1/1       Running             0          5m
kube-dns-6fc954457d-97wtm       3/3       Running             0          5m
kubernetes-dashboard-5zfj6      1/1       Running             0          5m
tiller-deploy-cffb976df-rm4l7   0/1       ContainerCreating   0          0s

PS> kubectl get pods -n kube-system
NAME                            READY     STATUS    RESTARTS   AGE
kube-addon-manager-minikube     1/1       Running   0          12m
kube-dns-6fc954457d-97wtm       3/3       Running   0          11m
kubernetes-dashboard-5zfj6      1/1       Running   0          11m
tiller-deploy-cffb976df-rm4l7   1/1       Running   0          6m
Let’s create the Helm chart for our hello world application. Start by creating a folder called helm (or any name you want) and inside that folder let’s create our chart with helm create blog-helm:
PS> mkdir helm
PS> cd helm
PS> helm create blog-helm
We get a bunch of new files (browse code at this point):
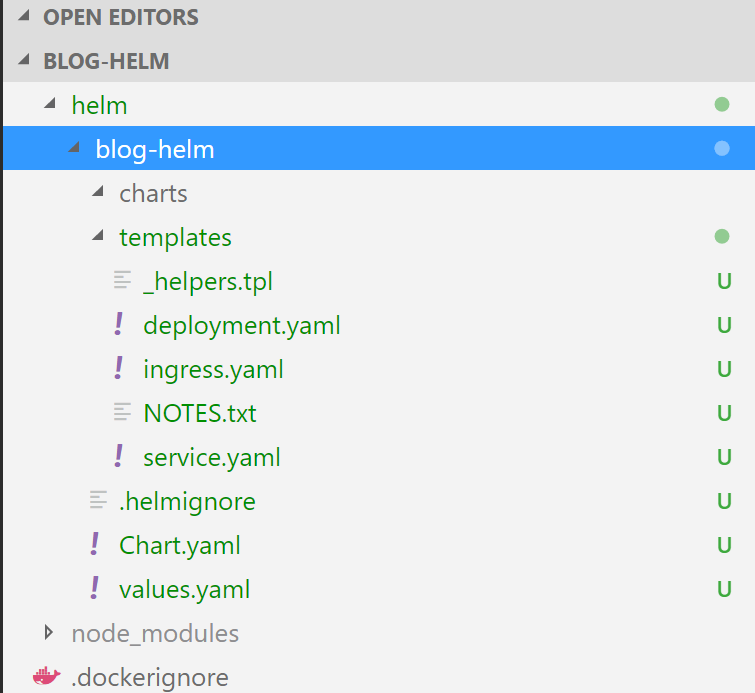
.helmignorewill be used to ignore files when packaging the chart. It's similar to.gitignoreand.dockerignore.Chart.yamlis the main file of the chart. It's mainly there to identify the chart's name and its version.values.yamlis a set of values that can be used in the templates of the chart. You can specify here whatever values you want. The interesting thing is that when you're using the chart, you can override these values. We'll see how this works great when modelling environment specific configuration for deploying to multiple environments on a next post._helpers.tpldefines some handy helpers that can be used in the templates.deployment.yaml,ingress.yamlandservice.yamlare templates which describe our Kubernetes deployment, ingress and service respectively.NOTES.txtwill be used to display a help message when we'll install the Helm chart.
We can have a look at service.yaml:
apiVersion: v1
kind: Service
metadata:
  name: {{ template "fullname" . }}
  labels:
    app: {{ template "name" . }}
    chart: {{ .Chart.Name }}-{{ .Chart.Version | replace "+" "_" }}
    release: {{ .Release.Name }}
    heritage: {{ .Release.Service }}
spec:
  type: {{ .Values.service.type }}
  ports:
    - port: {{ .Values.service.externalPort }}
      targetPort: {{ .Values.service.internalPort }}
      protocol: TCP
      name: {{ .Values.service.name }}
  selector:
    app: {{ template "name" . }}
    release: {{ .Release.Name }}
The templating syntax of Helm is based on Go templates. The go language is attracting a lot of attention these days and coincidentally all these tools are written in go. Some quick observations:
- we can reference values found in
Chart.yamle.g..Chart.Name - we can reference values found in
values.yamle.g..Values.service.name. Keep in mind again that we can provide overrides when rolling out the app with Helm.
Let’s see our values.yaml:
# Default values for blog-helm.
# This is a YAML-formatted file.
# Declare variables to be passed into your templates.
replicaCount: 1
image:
  repository: nginx
  tag: stable
  pullPolicy: IfNotPresent
service:
  name: nginx
  type: ClusterIP
  externalPort: 80
  internalPort: 80
ingress:
  enabled: false
  # Used to create an Ingress record.
  hosts:
    - chart-example.local
  annotations:
    # kubernetes.io/ingress.class: nginx
    # kubernetes.io/tls-acme: "true"
  tls:
    # Secrets must be manually created in the namespace.
    # - secretName: chart-example-tls
    #   hosts:
    #     - chart-example.local
resources: {}
  # We usually recommend not to specify default resources and to leave this as a conscious
  # choice for the user. This also increases chances charts run on environments with little
  # resources, such as Minikube. If you do want to specify resources, uncomment the following
  # lines, adjust them as necessary, and remove the curly braces after 'resources:'.
  # limits:
  #  cpu: 100m
  #  memory: 128Mi
  # requests:
  #  cpu: 100m
  #  memory: 128Mi
By default, it doesn’t install our application but it installs nginx. Let’s fix this:
image:
  repository: blog-helm
  tag: latest
  pullPolicy: Never
And also we need to change the service type to NodePort and adjust the internal port:
service:
  name: blog-helm
  type: NodePort
  externalPort: 80
  internalPort: 3000
Now that we have our Helm chart (browse code at this point), we can use it to deploy our application:
PS> helm install ./blog-helm
NAME:   callous-koala
LAST DEPLOYED: Mon Nov 27 19:46:16 2017
NAMESPACE: default
STATUS: DEPLOYED

RESOURCES:
==> v1/Service
NAME                     CLUSTER-IP  EXTERNAL-IP  PORT(S)       AGE
callous-koala-blog-helm  10.0.0.223  <nodes>      80:30129/TCP  1s

==> v1beta1/Deployment
NAME                     DESIRED  CURRENT  UP-TO-DATE  AVAILABLE  AGE
callous-koala-blog-helm  1        1        1           0          1s

NOTES:
1. Get the application URL by running these commands:
  export NODE_PORT=$(kubectl get --namespace default -o jsonpath="{.spec.ports[0].nodePort}" services callous-koala-blog-helm)
  export NODE_IP=$(kubectl get nodes --namespace default -o jsonpath="{.items[0].status.addresses[0].address}")
  echo http://$NODE_IP:$NODE_PORT
Since we didn’t provide a name, Helm generates a release name automatically (callous-koala).
Note that the only file we had to change is values.yaml. That’s because the default chart that gets generated automatically by Helm is quite a good starting point.
We can delete the release with helm delete --purge callous-koala. If we want to install it again with a predictable name, we can run helm install ./blog-helm --name blog-helm. We can see the releases we have with helm list:
PS> helm list
NAME            REVISION        UPDATED                         STATUS          CHART           NAMESPACE
blog-helm       1               Mon Nov 27 20:01:34 2017        DEPLOYED        blog-helm-0.1.0 default
And we can upgrade an existing release if we want to with helm upgrade.
While this is all very nice and interesting, we are far from implementing a continuous deployment pipeline. We’ll start doing that in the next posts. The main points to think about is to see what our artifacts are, how to version them and how to support multiple environments for deployments. The goal is to be able to use Helm to deploy whatever (whatever branch), wherever (any environment).