In the series so far, we have build a CI pipeline that produces a Docker image and a Helm chart. They are linked together with a unique version, allowing us to use Helm to deploy any feature branch we want. Now we’ll see how to implement a traditional DTAP and use Helm to deploy whatever, wherever.
When we deploy the Helm chart, it is possible to provide an additional values.yaml file. The values on that file will override the values defined inside the Helm chart. We can use this feature to model our environment-specific configuration.
Let’s create a file named values-test.yaml side by side with values.yaml:
# Values for the test environment.
ingress:
  hosts:
    - test.blog-helm.local
This file contains the environment-specific configuration of the test environment. We only need to override the host. All other values are the same, so we don’t need to define them.
We repeat this for acceptance, creating values-acc.yaml:
# Values for the acceptance environment.
ingress:
  hosts:
    - acc.blog-helm.local
For production, we could do the same, but another approach is to treat the default values file, values.yaml, as the production values. In any case, we will need a values-prod.yaml to make the deployment logic a bit simpler.
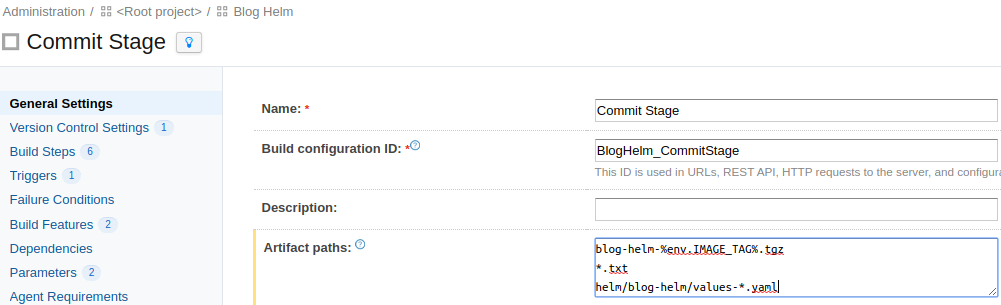
To use these environment-specific files during deployment, we need to publish them as artifacts in our build plan. We need to add in the artifact definitions the line helm/blog-helm/values-*.yaml:
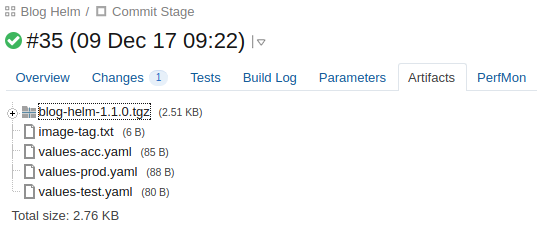
and the build will publish them:
Now we need to consume them in the Deploy Stage, so let’s update the Artifact Dependency to have the line values-*.yaml:

Let’s revise now our deployment script. So far it looks like this:
IMAGE_TAG=$(cat image-tag.txt)
echo "Using version $IMAGE_TAG"

helm upgrade --install blog-helm \
  ./blog-helm-${IMAGE_TAG}.tgz \
  --set image.tag=$IMAGE_TAG \
  --wait
The helm supports a --values argument, which we need to provide e.g. --values ./values-acc.yaml for acceptance.
An important thing is that we’ll also need to change the release name, which currently is blog-helm. This also needs to be environment specific, as each release will model a different environment.
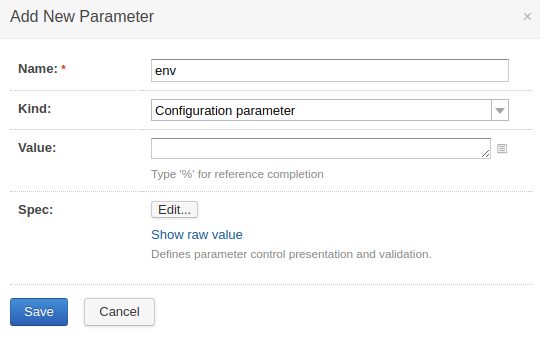
The easiest way to do this in TeamCity is to make our Deploy Stage parametric. We add a new configuration parameter named env (it can be any name we want):
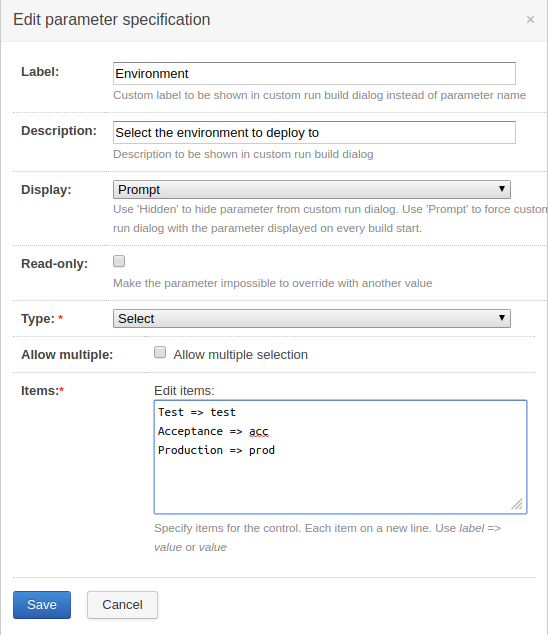
To make sure the user who deploys must choose an environment, we configure the spec of this parameter to be a Prompt. We also make it a bit more user friendly by providing a list of allowed values:
With this in place, we revise our deployment script to use the env configuration parameter:
IMAGE_TAG=$(cat image-tag.txt)
echo "Using version $IMAGE_TAG"

helm upgrade --install blog-helm-%env% \
  ./blog-helm-${IMAGE_TAG}.tgz \
  --set image.tag=$IMAGE_TAG \
  --values ./values-%env%.yaml \
  --debug \
  --wait
We changed the release name to be blog-helm-%env%, which will use the file values-%env%.yaml. The extra flag
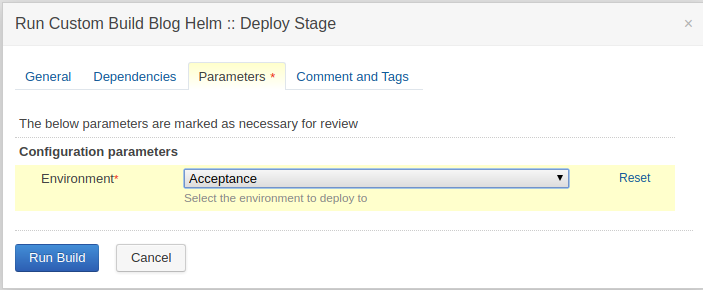
When we try to deploy, we get a popup asking us to select the environment:
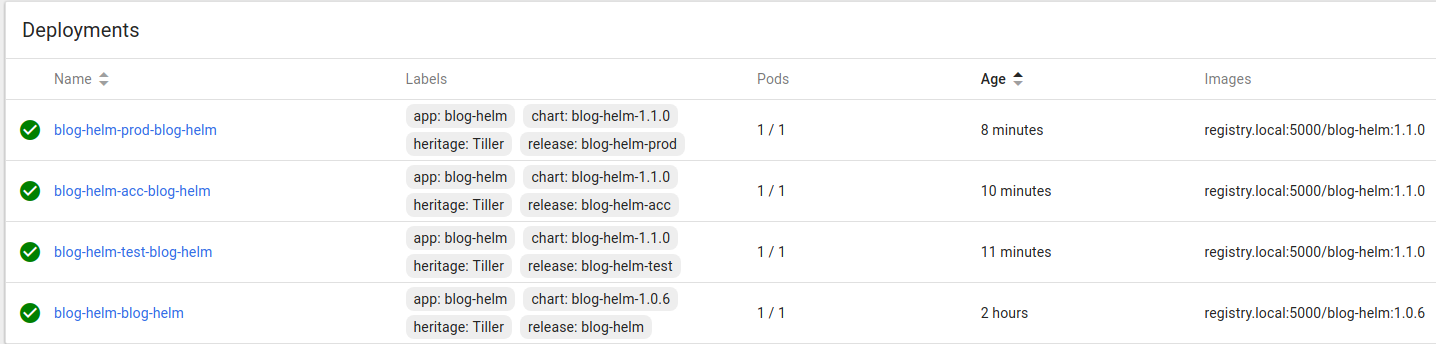
If we deploy to all environments, one by one, we’ll end up with these deployments in Kubernetes:
Some cleanup work is needed: we still have the old release, blog-helm. We can remove it with this command:
$ helm delete --purge blog-helm
release "blog-helm" deleted
Small sidenote: TeamCity is not strictly speaking a deployment tool. It doesn’t have features like deployment environments, promoting a deployment to a different environment, approving/rejecting deployments, etc. It is however possible to model a deployment in a better way than what I did here, e.g. with snapshot dependencies and project templates.
To be able to access our environments, we need a small update on the /etc/hosts file:
192.168.99.100 test.blog-helm.local
192.168.99.100 acc.blog-helm.local
192.168.99.100 blog-helm.local
All our hostnames point to the cluster and then Ingress knows which application to use.
A small problem with our hello-world application is that it just says “Hello, world!”. So we can’t be sure which version we’re looking at, or that the environments are setup correctly. Let’s modify it so that it prints the version found in package.json:
/* eslint-disable no-console */
const express = require('express');
const packageJson = require('./package.json');

const app = express();
app.get('/', (req, res) => res.send(`
<html>
  <head>
    <title>blog-helm</title>
  </head>
  <body>
<h1>Hello world!</h1>
package.json version: ${packageJson.version}

  </body>
</html>
`));
app.listen(
  3000,
  () => console.log('Example app listening on port 3000!'),
);
/* eslint-enable no-console */
We can deploy to the test environment. Let’s double check the versions in the Kubernetes dashboard:

Our test environment is on the latest and greatest. Now the change is visible on the browser:

The test environment on the left has the latest code but acceptance still has the old version.
What if we want to know on which environment we’re running the application? We can set an environment variable using the Helm chart. We need to define it in the deployment.yaml template:
    spec:
      containers:
        - name: {{ .Chart.Name }}
          image: "{{ .Values.image.repository }}:{{ .Values.image.tag }}"
          imagePullPolicy: {{ .Values.image.pullPolicy }}
          ports:
            - containerPort: {{ .Values.service.internalPort }}
          env:
            - name: APP_ENV
              value: {{ .Values.env }}
and we’ll need to set this in all values-*.yaml files accordingly, e.g. for acceptance in values-acc.yaml:
# Values for the acceptance environment.
ingress:
  hosts:
    - acc.blog-helm.local
env: acc
Printing it in the application is easy:
Environment: ${process.env.APP_ENV}
Let’s deploy again, this time to all environments:

This time, we can see that the environments are setup correctly.
One final experiment has to do about feature branches. If you remember our versioning strategy, we compose an image tag based on the version in package.json and the git SHA. We can use an environment variable for this too:
          env:
            - name: APP_ENV
              value: {{ .Values.env }}
            - name: IMAGE_TAG
              value: {{ .Values.image.tag }}
and we can print it in index.js:
<h1>Hello world!</h1>
package.json version: ${packageJson.version}

Docker image tag: ${process.env.IMAGE_TAG}

Environment: ${process.env.APP_ENV}

This final experiment proves we can truly deploy whatever, wherever: any feature branch in any environment. With this milestone, we can wrap up this series of posts. We have achieved various goals:
- we dockerized an application
- we dockerized the build plan of the application, while keeping user friendly elements like test reports
- we included the infrastructural configuration of the application (Helm chart) in the code repository. This allows us to change the application and its infrastructure configuration in a single pull request.
- we defined and implemented a versioning strategy which ties together the application with its infrastructure, allowing us to use Helm as a deployment tool, for any branch
- we modeled a DTAP by using Helm releases and isolated the environment-specific configuration in separate files containing the bare minimum.
This is actually enough for a continuous deployment pipeline using Helm. From here you can add all sorts of bells and whistles:
- explore namespaces in Kubernetes
- automate deployments for certain branches
- add linting and testing for Helm charts
- dynamically create environments
- use a Helm repository
- think about application configuration vs infrastructure configuration
- implement the CI pipeline as code
But the bare minimum is to be able to deploy whatever, wherever. And that’s complete!