So far, we have essentially only one test, a test that verifies the title of the browser. Let’s try to make a more interesting test. We’ll need to interact with elements on the page and simulate the user’s journey.
Since we started with the Google site, we’ll try to write a test that searches for something. The Google homepage has a text box and a search button. We have to type some text into the text box and click the button to perform the search, just like a normal human user would do. It’s important to write your tests as close as possible to mimic the normal user behavior. According to the documentation, we need the setValue method to set the text and the click method to click the button.
Both these methods accept a selector parameter. Selectors are used to identify the page element that you want to interact with. If you’re familiar with CSS, then good news! CSS selectors are supported and are perhaps the easiest to use. There are more selector options, like XPath, all documented here.
To figure out the selector we need to use for the search text box, we use a browser and the developer tools to inspect the element:
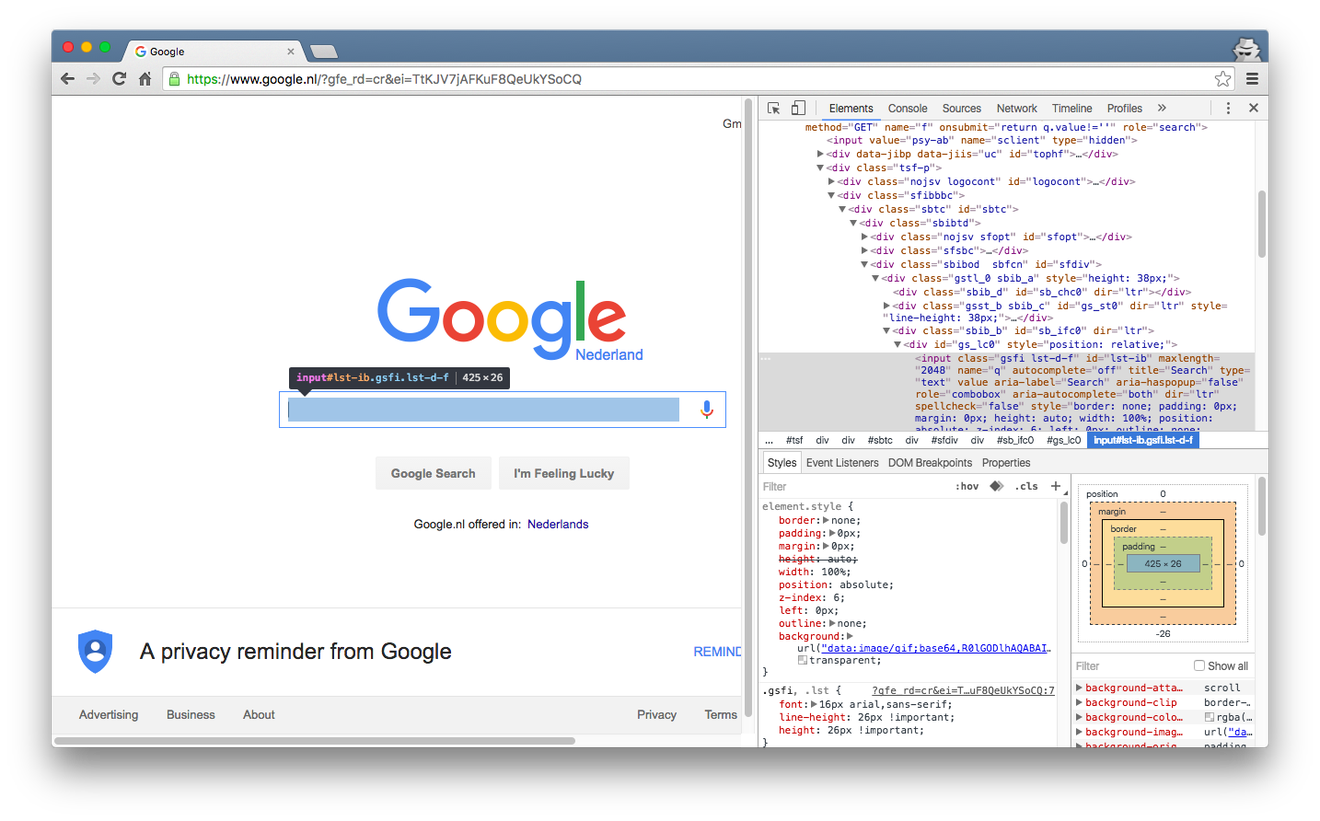
Just like with CSS, making selectors overly specific is not advised. For example, if you use a selector like this (I’m just copying the last parts of the path from the developer tools):
div > div > #sbtc > div > #sfdiv > div > #sb_ifc0 > #gc_lc0 > input#lst-ib
then if someone removes or adds a div for all sorts of reasons (e.g. to align the text box differently), then the test will fail because it won’t be able to locate the selector.
You can use the Console tab of the Developer Tools as well and play a bit to verify that the selector works. For example, try this:
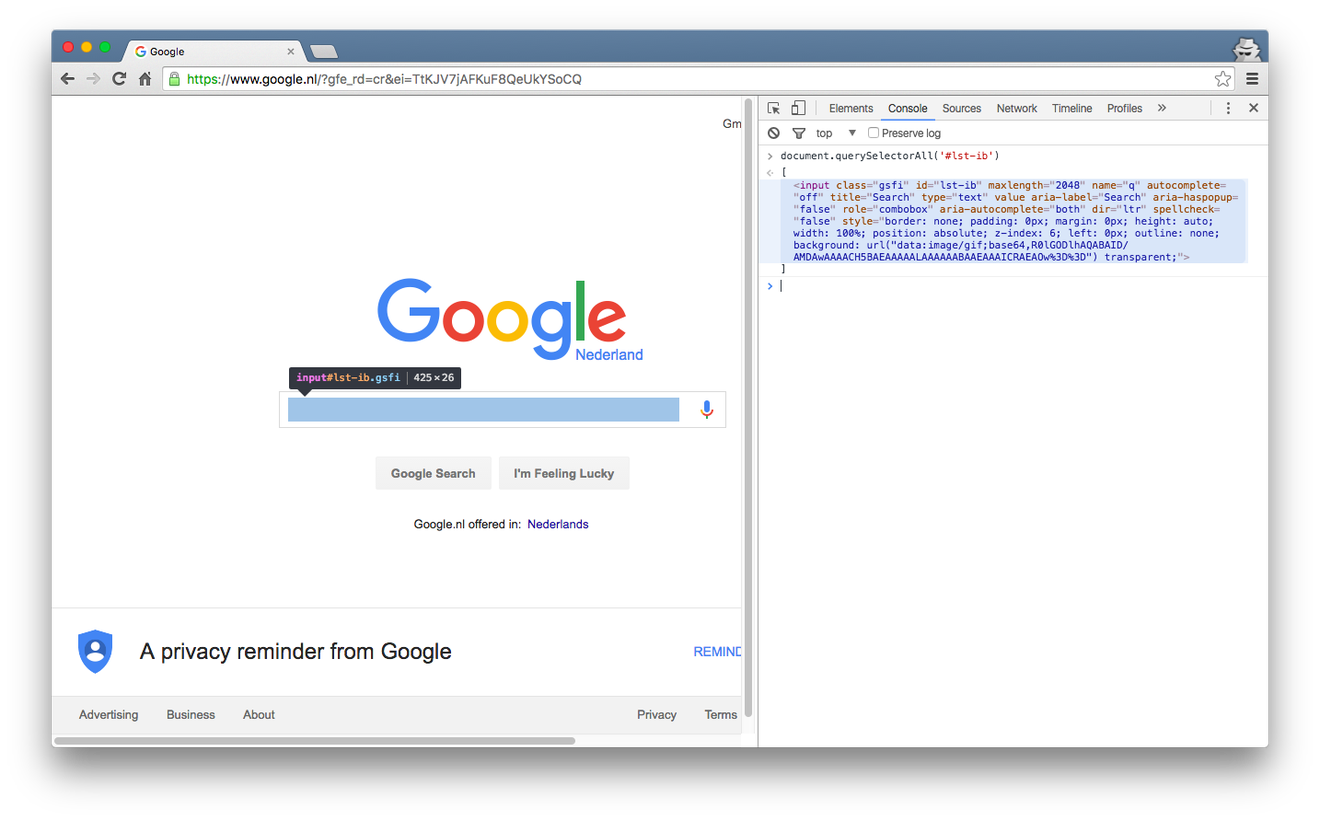
Typing document.querySelectorAll('#lst-ib') in the console proves that this selector is good enough, as it matches only the text box we care about. However, another selector can do the trick: input[type=text]. This one happens to work as well, because this page consists of only one text box. Another selector that does the trick: input[name=q]. As you can guess, picking the correct selector can be a bit subjective.
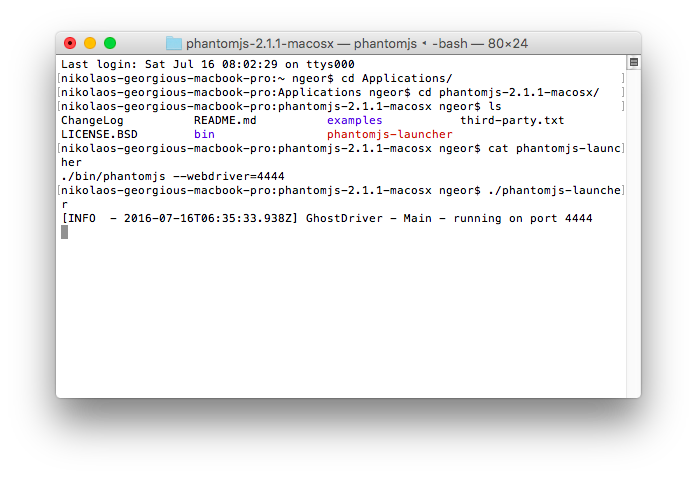
Let’s fire up phantom to run our tests. I have a small shell script for that:
To verify that our selector works for WebDriverIO as well, let’s write a first test for that:
var expect = require('chai').expect;
var WebDriverHelper = require('../lib/webdriver_helper');

describe('Google', function() {
    WebDriverHelper.setupBrowser();

    it('should verify the title of Google', function() {
        return WebDriverHelper.browser
            .url('http://www.google.com')
            .getTitle()
            .then(function(title) {
                expect(title).to.equal('Google');
            });
    });

    it('should have a text search box', function() {
        return WebDriverHelper.browser
            .url('http://www.google.com')
            .isVisible('input[name=q]')
            .then(function(visible) {
                expect(visible).to.be.true;
            });
    });
});
This works fine. We use the isVisible method to verify that the element is visible on the page. We can speed up the tests here by moving the url call to a common before hook. We don’t need to navigate twice to the page in order to perform our tests in this particular case. This is a nice optimization, but only do it when the tests won’t affect each other.
before(function() {
    return WebDriverHelper.browser.url('http://www.google.com');
});

it('should verify the title of Google', function() {
    return WebDriverHelper.browser
        .getTitle()
        .then(function(title) {
            expect(title).to.equal('Google');
        });
});

it('should have a text search box', function() {
    return WebDriverHelper.browser
        .isVisible('input[name=q]')
        .then(function(visible) {
            expect(visible).to.be.true;
        });
});
Now, we need to click on the search button, which means we need a selector that identifies it. The input[type=submit] selector is simple but it matches both the Search button and the “I’m Feeling Lucky” button. According to the documentation of the click method, if there are many elements matching, only the first one will be clicked. So in this case, this selector could work but only for clicking. We can use the input[value*=Google] selector, which matches the button text. This works as well. If this were our site, we could modify the HTML to have easier CSS selectors to work with (e.g. unique ID or class name).
So, what should we search for? Let’s follow the latest trend and let’s search for some Pokemon!
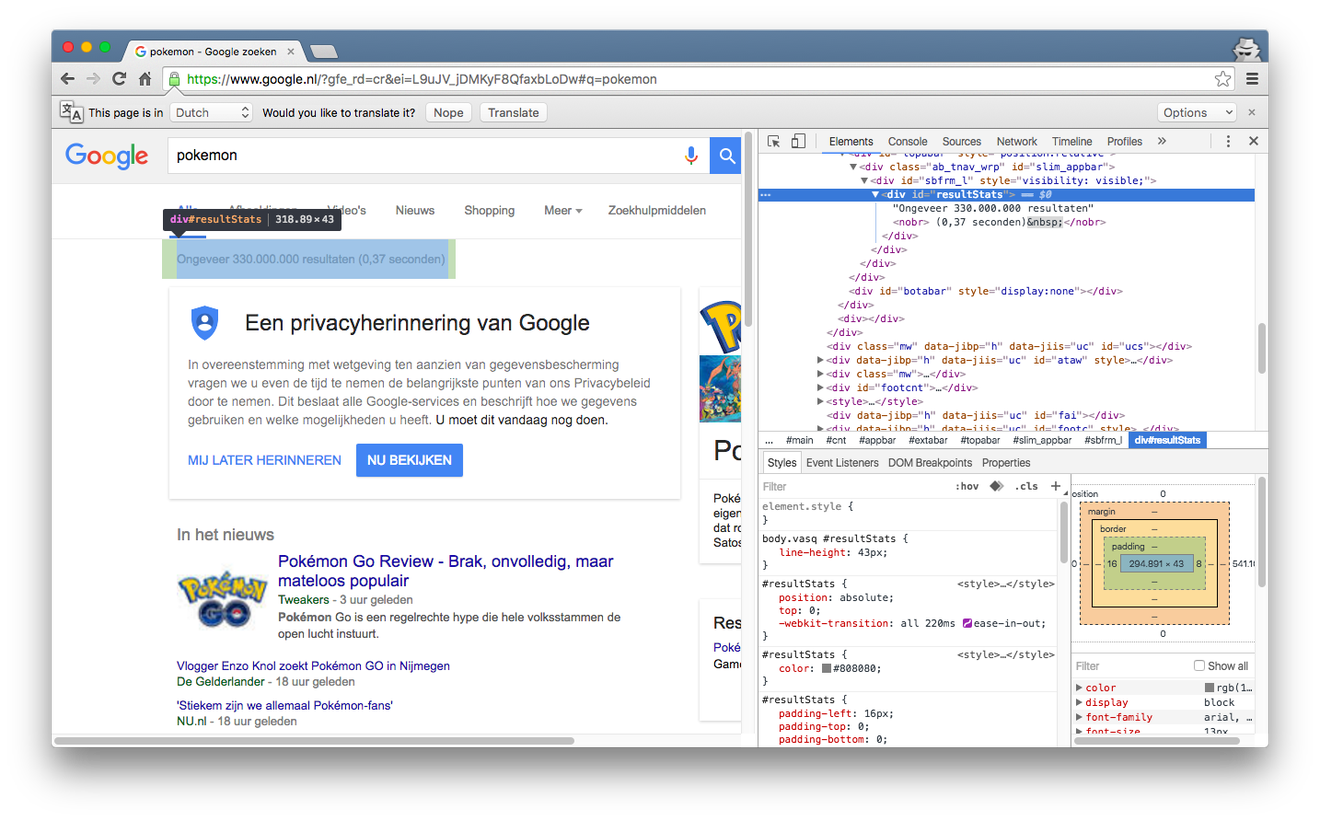
For this example, we’ll try to match the result count. It’s contained in a div with the id resultStats. We can query for its text with the getText method. The screenshot is in Dutch and it says “Ongeveer 330.000.000 resultaten (0,37 seconden)”. Translation: About 330.000.000 results (0,37 seconds). Let’s write the test:
it('should search for pokemon', function() {
    return WebDriverHelper.browser
        .setValue('input[name=q]', 'Pokemon')
        .click('input[value*=Google]')
        .getText('#resultStats')
        .then(function(text) {
            expect(text).to.equal('Ongeveer 330.000.000 resultaten (0,37 seconden)');
        });
});
If we run it, it fails (at least on my computer):
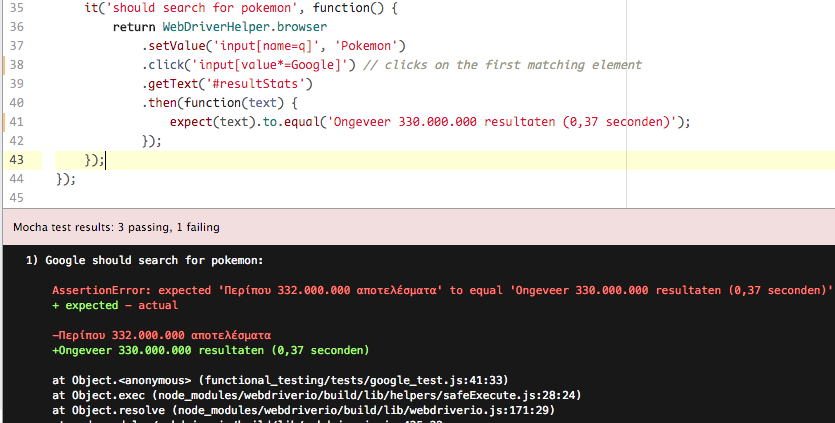
Wow! What happened here? My computer’s locale is Greek, so phantom inherited that and Google detected it. As a result, phantom got served the Greek version of the Google results page. Additionally, the results are different (332 million vs 330 million, so Greek version has 2 million more pokemon :) ). The search duration is also missing.
Now, this is a failure that is more or less easy to reason and understand. This won’t always be the case. How do we troubleshoot a failing test? Especially when it happens during CI and it’s a test that fails randomly. These are the most difficult to diagnose and hurt the confidence to your build. You need as much information as you can get. Ideally, you’d like to know, what was the browser showing when the test failed? We’ll examine this on the next post.