This post describes what I had to do in order to have the latest and greatest Ruby on Rails up and running on my machine. At this point, that is version 3.0.1.
I consulted a few guides to make things work, most notably this very good article, but not everything worked as expected on my machine. The biggest reason was that I have a 64 bit system.
Existing environment
Mac OS X 10.5.8 (Leopard) 64 bits ( running on a MacBook Pro )
Ruby 1.8.6
MySQL 5.1.42-osx10.5-x86_64 (previously installed in /usr/local/mysql)
SQLite 3.4.0
I don’t quite remember if and when I had installed something of the above by myself in the past. MySQL looks like something I might have done myself, because it’s in /usr/local.
Ruby
The installed Ruby that comes with Mac OS X is version 1.8.6. This is not supported according to the Ruby on Rails website, which recommends 1.9.2 or 1.8.7. I decided to go for the 1.9.2.
I downloaded the source from Ruby’s website and installed it with the usual configure make and make install:
./configure --prefix=/usr/local/ --with-arch=x86_64
make
make install
The above will compile Ruby for 64 bits and it will install it under /usr/local/. The magic is happening at the with-arch flag that specifies 64 bits. If we skip this, it will build the 32 bit version, which will not be able to talk to the 64 bit MySQL for example. I tried to have everything at 64 bits to avoid such surprises.
Adjust environment path
Usually, /usr/bin will have priority over the /usr/local/bin. If you already have an older version of Ruby installed as I had, you will need to adjust the environment path so that /usr/local/bin will be checked first.
The easiest way to do it is to edit your ~/.profile file and include the following line:
export PATH="/usr/local/bin:$PATH"
This way the new binaries will have priority over the old ones. If the path has been adjusted correctly you will get:
$ which ruby
/usr/local/bin/ruby
$ ruby -v
ruby 1.9.2p0 (2010-08-18) [x86_64-darwin9.8.0]
If you still get the following defaults:
$ which ruby
/usr/bin/ruby
$ ruby -v
ruby 1.8.6 (2009-06-08 patchlevel 369) [universal-darwin9.0]
then you’ll need to figure out what’s wrong with your path.
Installing Rails
The above steps have installed Ruby but we also get gem for free. So all we need to do in order to have rails is:
sudo gem install rails
This will install various other gems that Rails needs, but it will not install support for SQLite or MySQL. This needs to be done separately. Rails however should be installed at this point.
SQLite
The default database adapter is no longer MySQL but SQLite. And Leopard’s version is not supported. Leopard comes with version 3.4.0 but when I tried to install the SQLite gem I was asked to upgrade to 3.6.0 or newer. The latest stable is 3.7.3 so I took that from SQLite’s website and installed it.
./configure --prefix=/usr/local CFLAGS="-arch x86_64"
make
make install
Notice that here we don’t have a with-arch flag so we have to pass the architecture in a different way. As with Ruby, SQLite will be installed under /usr/local.
After SQLite3 is installed, building the gem is easy:
sudo gem install sqlite3
Test Rails
At this point rails should work together with SQLite. Time for some rails magic!
rails new MyApp
cd MyApp
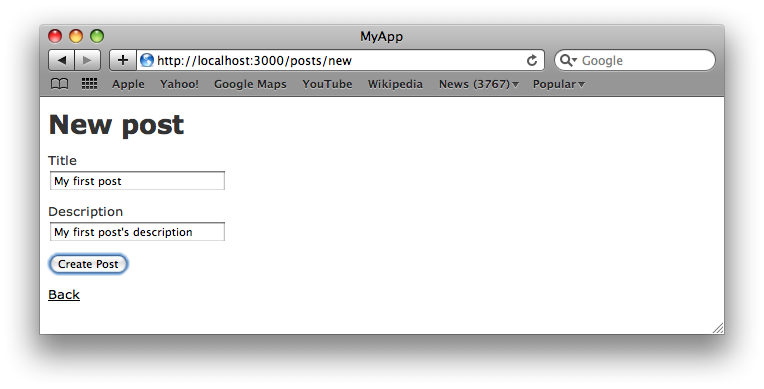
rails generate scaffold Post Title:string Description:string
rake db:migrate
rails server
The following screen shows the system information. Notice that Rails version is 3.0.1

With the scaffold magic, we get at /posts an entire CRUD interface for Posts containing a title and a description:
![]()
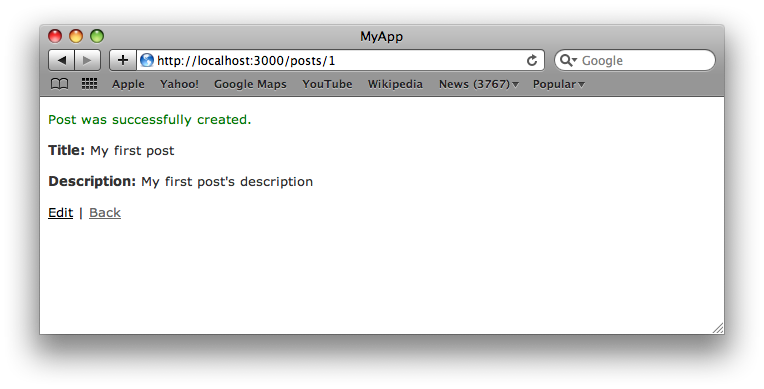
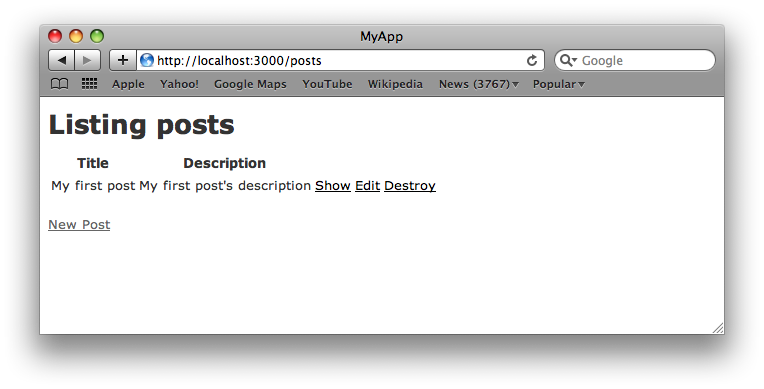
And we didn’t have to write a single line of code.
MySQL
I already had MySQL installed on my system (the 64 bit version).
Nothing surprising here. There are two gems, mysql2 and mysql. Not sure if both gems are needed, but mysql2 is definitely needed.
The following line will install the gem mysql2:
sudo gem install mysql2
And this will install the gem mysql (but I’m not sure if it’s really needed):
sudo gem install mysql -- --with-mysql-dir=/usr/local/mysql
Setting up a rails app with MySQL is almost the same with SQLite. The command that creates the app skeleton is altered in order to specify the different database:
rails new MyApp --database=mysql
Also, before running rake in order to create the database schema you need to actually go and create the database in MySQL. Just create an empty database and rake will create the schema for you. The database name should be the name of the app suffixed with “_development”, in our case myapp_development.
Don’t forget to edit database.yml to supply the correct username and password for MySQL.
One other problem that I had with MySQL is that strings are generated as VARCHARs of non unicode collation, which turns Greek characters into question marks when playing with the application. I didn’t experience this problem with SQLite. Perhaps this is something that I can configure on MySQL so that every table is by default using the unicode collation.
That’s it! I hope this helps somebody.