In this post, I’ll add some automated browser tests using PhantomJS and WebdriverIO.
Add WebdriverIO
Let’s start by adding the webdriverio package as a dev dependency:
$ npm install --save-dev webdriverio
Next, we need to setup the initial configuration with:
$ ./node_modules/.bin/wdio config
This starts a configuration wizard with some questions:
- Where do you want to execute your tests? On my local machine
- Which framework do you want to use? mocha
- Shall I install the framework adapter for you? Yes
- Where are your test specs located?
./test/specs/**/*.js - Which reporter do you want to use? dot, junit
- Shall I install the reporter library for you? Yes
- Do you want to add a service to your test setup? phantomjs
- Shall I install the services for you? Yes
- Level of logging verbosity silent
- In which directory should screenshots gets saved if a command fails?
./errorShots/ - What is the base url?
http://localhost:3000
I mostly left the default options. I changed the reporter to include junit, because I want to consume the report in the CI server. I also added the phantomjs service because I don’t want to set that up by myself.
Add the first test
Now that WebdriverIO is configured, I can add an example test:
const assert = require('assert');

describe('homepage', () => {
  it('should have the correct title', () => {
    browser.url('/');
    const title = browser.getTitle();
    assert.equal(title, 'blog-helm');
  });
});
Small note: the last time I dove into WebdriverIO, things were a bit more complicated, with promises and callbacks. Now all that seems to be hidden away.
Run the tests
To run the tests, we can run ./node_modules/.bin/wdio. Since we’re using npm scripts, I’ll add an npm script for this as well in package.json:
  "scripts": {
    "lint": "eslint .",
    "lint-junit": "eslint -f junit -o test-reports/eslint.xml .",
    "test": "npm run lint",
    "start": "node index.js",
    "wdio": "wdio"
  }
This way we can run them with npm run wdio.
For the junit reporter to work, we need to configure its output directory. That’s done in the wdio.conf.js configuration file:
  reporters: ['dot', 'junit'],

  reporterOptions: {
    junit: {
      outputDir: './test-reports',
    },
  },
Configure CI
I’d like to be able to run these tests on any environment after the deployment has succeeded. This requires the dev dependencies (webdriverio and friends), which are in the CI image we use to run linting and unit tests, which isn’t published to the docker registry. The first step therefore is to publish the CI image to the docker registry during the Commit Stage, so that it’s available in the Deployment build configurations.
With that in place, I can run the tests like this:
docker run \
    --rm -v $(pwd)/test-reports:/app/test-reports \
    blog-helm-ci:%build.number% \
    npm run wdio -- -b %app.baseurl%
Notice that I’m passing the base URL I configured in the previous post in the %app.baseurl% configuration parameter. This way the tests run against the correct environment.
PhantomJS problems with Alpine
While in theory this should’ve worked, it didn’t. PhantomJS did not run. The reason had to do with the Docker image. It was based on Alpine, which is not supported by PhantomJS. The easiest workaround was to switch to the slim flavor, which works. As this is only the CI image and not the production image, I think it’s okay.
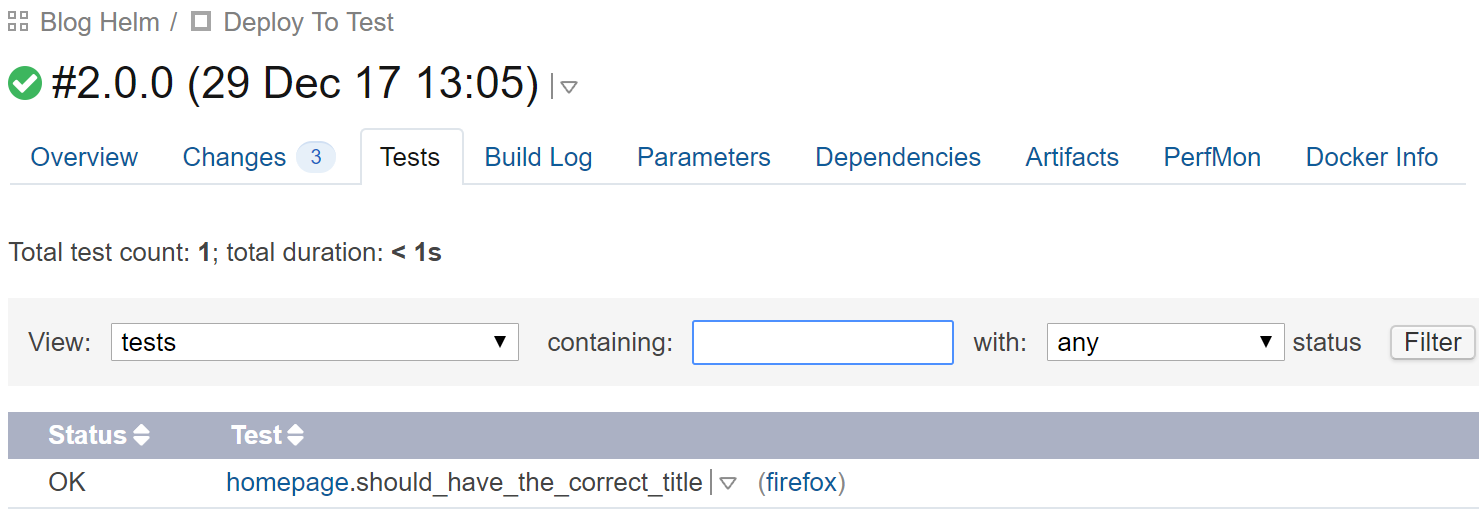
Results
In the end, we can see that we have the new test passing on all environments:

And we can see the test title in the test report too: